In the bustling rhythm of a tight kitchen, every inch counts-especially when it comes to storing something as versatile and essential as broth. Whether you’re simmering a hearty chicken stock or keeping a batch of vegetable broth on standby, the challenge is clear: how do you save space without sacrificing convenience? Enter the world of clever broth storage hacks, where innovation meets practicality. From repurposing everyday items to embracing space-saving containers, these smart strategies will help you maximize your kitchen’s potential, ensuring that your savory liquids are always within reach, neatly organized, and ready to elevate your next culinary creation. Let’s dive into the art of broth storage and transform your cozy kitchen into a model of efficiency.
- Creative Approaches to Maximize Vertical Space with Broth Containers
- Smart Labeling Techniques to Keep Your Broth Organized and Accessible
- Utilizing Multi-Use Containers for Efficient Broth Storage
- Creative Freezer Solutions to Preserve Broth Without Clutter
- Prep and Cook Time
- Yield
- Difficulty Level
- Ingredients for Homemade Broth (Optional Basic Recipe)
- Instructions
- Tips for Success
- Serving Suggestions
- Q&A
- Key Takeaways
Creative Approaches to Maximize Vertical Space with Broth Containers
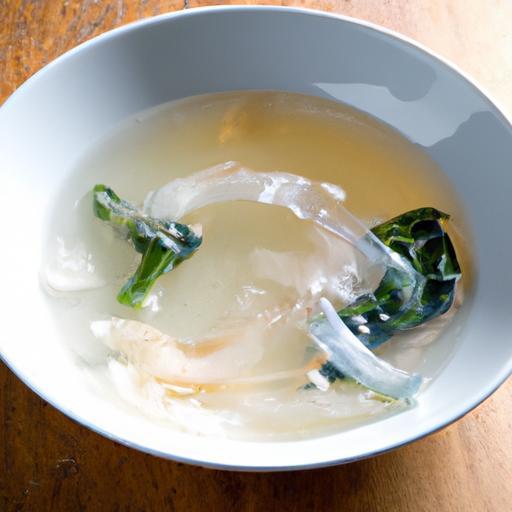
Clever broth storage hacks for tight kitchen spaces begin with smart strategies to harness every inch of vertical space, turning clutter into order effortlessly. Imagine your slim broth containers stacked like puzzle pieces on tall shelves or inside cabinets, freeing precious countertop real estate. Opt for uniform, stackable containers designed specifically for liquids; their snug fit and airtight seals prevent spills as well as wasted space. Transparent containers allow you to see the golden hues of your homemade chicken or vegetable broth, adding a visual cue that aids quick ingredient grabs when cooking.
Smart Labeling Techniques to Keep Your Broth Organized and Accessible
Labeling is your kitchen’s silent organizer. Using waterproof, magnetic label strips or erasable chalk-on tags on each container takes storing broth to a new level of accessibility and ease. Include essential details like the broth type, date of preparation, and suggested use-by date to stay ahead of spoilage. Color-coded labels help differentiate poultry from beef or veggie broths instantly. For tech-savvy cooks, QR codes linked to recipe notes or expiration reminders can be affixed, merging smart home convenience with kitchen practicality.
Utilizing Multi-Use Containers for Efficient Broth Storage
Maximize your storage strategy by using multi-use containers-those that adapt beyond just freezing broth. Silicone reusable freezer bags with a standing base mold neatly into vertical racks and are easy to squeeze out when thawing. Glass jars with screw-top lids double as storage for broth and later for sauces or salad dressings, reducing container clutter. Measure and portion broth into single-use sizes to prevent waste while enabling flexibility.
Creative Freezer Solutions to Preserve Broth Without Clutter
When freezer space is tight, think outside the box for broth preservation. Freeze broth in silicone muffin molds or ice cube trays to create ready-sized cubes that slide effortlessly into freezer bags. These cubes thaw quickly for impromptu soups or sauces, erasing the need for bulky storage. Stackable wire racks inside the freezer can vertically organize containers, making every inch count. Finally, keep a rotating broth inventory by placing newer batches at the back and older ones upfront to avoid forgotten containers.
Prep and Cook Time
- Preparation Time: 10 minutes (for labeling and container prep)
- Freezing Time: 4 hours minimum
- Thawing Time: 1-3 hours depending on portion size
Yield
Storage solutions designed for approximately 8 quarts of broth, divisible into varying portion sizes for versatile use.
Difficulty Level
Easy – Perfect for beginners looking to organize their kitchen space efficiently.
Ingredients for Homemade Broth (Optional Basic Recipe)
- 3 lbs chicken bones or beef marrow bones
- 2 large carrots, chopped
- 2 stalks celery, chopped
- 1 large onion, quartered
- 4 cloves garlic, smashed
- 10 cups cold water
- 1 tsp whole peppercorns
- 2-3 sprigs thyme or rosemary
- 1 bay leaf
- Salt to taste (optional)
Instructions
- Prepare your broth: Combine bones, vegetables, and herbs in a large pot. Add cold water to cover ingredients by at least an inch.
- Simmer gently: Bring to a low simmer, skimming foam from the surface every 30 minutes. Continue simmering for 6-8 hours for maximum flavor.
- Strain carefully: Using a fine mesh sieve, strain broth into heatproof containers. Cool quickly by placing containers in an ice bath to prevent bacterial growth.
- Choose your containers: Select stackable, uniform broth containers or silicone bags. Remember to leave headspace to accommodate liquid expansion during freezing.
- Label precisely: Write broth type, cooking date, and expiration on waterproof labels or attach chalk tags. Use color code or QR label for quick identification.
- Organize vertically: Place containers on tall shelves or stacking racks to maximize space. Silicone bags or cubes can be stored upright in freezer racks or baskets.
- Freeze efficiently: Freeze flat in bags for easy stacking or portion into ice trays for broth cubes. Once frozen, transfer cubes into labeled resealable bags for best space use.
Tips for Success
- Portion to your needs: Freeze broth in quantities tailored to your recipes to avoid waste.
- Use silicone molds: They are flexible, require little space, and make unmolding broth cubes effortless.
- Keep containers cool: Allow broth to cool before sealing and freezing to preserve container integrity and prevent freezer burn.
- Opt for airtight seals: Prevent freezer odors and maintain freshness by using leak-proof containers or quality bags.
- Rotate your stock: Place older broth in front of your storage space to ensure timely use.
Serving Suggestions
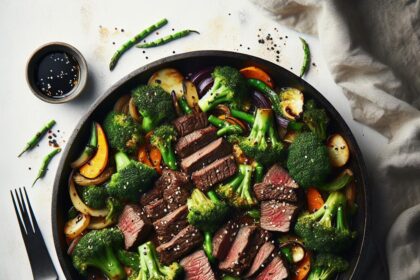
Broth preserved using these clever broth storage hacks for tight kitchen spaces is ready to complement any meal. Add a splash to risottos or stir into sauces for depth. Use broth cubes as quick flavor boosts for weekday soups or stews-just toss them into your simmering pot or sauté pan. Garnish with fresh herbs, cracked pepper, or a drizzle of olive oil to elevate presentation. For a comforting sip, warm broth with a squeeze of lemon and a sprinkle of toasted garlic chips is captivatingly cozy.
| Nutritional Information (per 1 cup) | Calories | Protein (g) | Carbs (g) | Fat (g) |
|---|---|---|---|---|
| Chicken Broth | 38 | 6 | 0 | 1 |
| Beef Broth | 40 | 7 | 0 | 1 |
| Vegetable Broth | 12 | 1 | 2 | 0 |
For a comprehensive guide and creative storage ideas, check our in-depth article on Space-Saving Kitchen Storage Solutions. To explore more on broth nutrition and preservation, visit the Academy of Nutrition and Dietetics.

Q&A
Q: Why is broth storage a challenge in small kitchens?
A: Tight kitchen spaces often mean limited fridge and pantry room, making it tricky to find a spot for bulky broth containers. Plus, broth can be liquid-heavy and awkwardly shaped, eating up valuable shelf space.
Q: What are some clever ways to store broth without cluttering the fridge?
A: Think slim and stackable! Use airtight, flat silicone freezer bags that stack like cards, or repurpose ice cube trays to freeze broth in bite-sized portions. This saves room and makes thawing just what you need a breeze.
Q: Can I store broth outside the fridge to save space?
A: Only if it’s properly canned or shelf-stable broth-otherwise, broth should always be refrigerated or frozen to avoid spoilage. For homemade broth, cool it quickly, strain well, and refrigerate or freeze promptly.
Q: How can I repurpose common kitchen items for broth storage?
A: Mason jars work wonders for storing broth-they’re airtight and stack neatly. Silicone muffin molds are perfect for freezing individual broth servings, and leftover yogurt or butter tubs can be upcycled for short-term storage.
Q: Are there any tricks to reduce broth storage space before refrigerating?
A: Yes! Remove excess fat from broth once cooled and store broth in smaller, portion-specific containers. Reducing container size means less wasted space and faster thawing times.
Q: What creative labeling tips can help manage multiple broth batches?
A: Label with dates and broth type using colorful washi tape or chalkboard stickers. This not only keeps track of freshness but also turns your fridge into a chic, organized gallery.
Q: How do I thaw broth efficiently in tight spaces?
A: Stack frozen broth cubes or flat bags vertically in a shallow dish in the fridge; they’ll thaw quickly and won’t spill. For faster options, immerse sealed portions in warm water rather than microwaving, which can scorch flavor.
Q: Any bonus tips for broth lovers with minimal storage?
A: Consider broth powder or concentrate packets-they take up almost no space and rehydrate quickly. Also, investing in a multi-tiered fridge organizer can create extra vertical room for broth containers and more.
By thinking outside the broth box, your tiny kitchen can still house flavorful magic-one clever storage hack at a time!
Key Takeaways
In the dance of kitchen organization, broth often takes a backseat-until now. With these clever broth storage hacks, even the smallest of kitchens can savor big flavors without the clutter. By thinking outside the pantry and embracing space-saving solutions, you’re not just storing broth-you’re setting the stage for every meal to shine. So go ahead, reclaim your counters and fridge shelves, and let your broth be as smartly stored as it is deliciously brewed. After all, in a tight kitchen, every inch counts-and every drop of broth deserves its perfect spot.


